

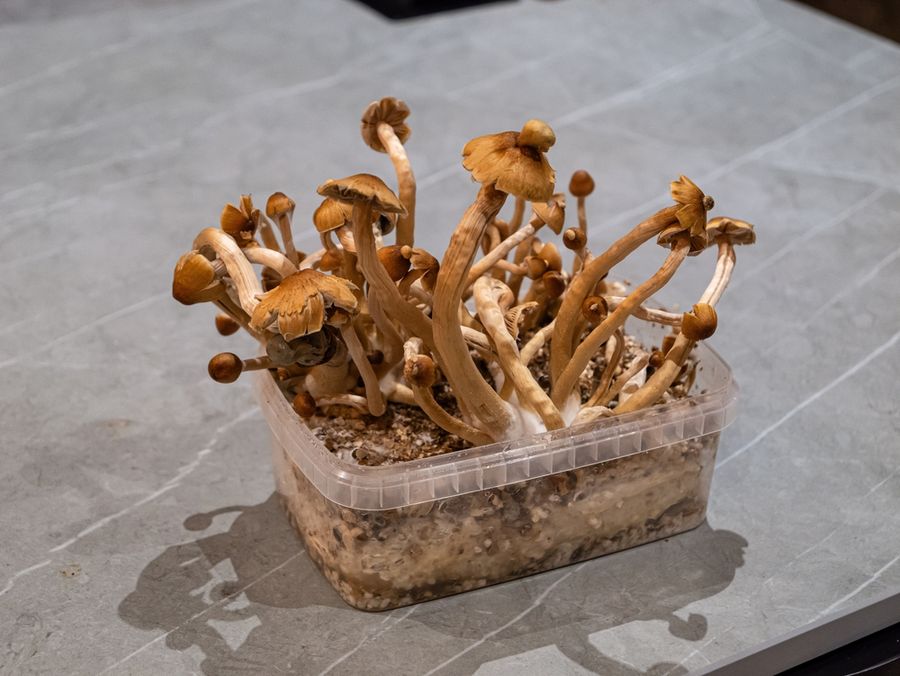
A countertop mushroom grow kit turns a small section of the kitchen into a compact food-growing space. Unlike herbs or leafy greens, mushrooms do not need a sunny windowsill or a pot filled with soil. Most kits arrive with the growing medium already colonized, leaving the home grower to manage moisture, airflow, and timing. With a simple routine and close observation, a dense cluster of fresh mushrooms can develop within days.
Choose a Kit That Fits Your Kitchen
Start with a kit intended for indoor fruiting rather than loose mushroom spawn. A ready-to-grow kit usually contains a block of sawdust or another substrate threaded with mycelium, the living fungal network that produces mushrooms. Oyster mushroom kits are approachable because they form visible clusters quickly, while lion’s mane kits provide a different shape, texture, and growing experience.
Before buying, check the species, expected temperature range, activation steps, and storage directions. Some blocks should be started soon after delivery, while others can be refrigerated temporarily. Note whether the mushrooms emerge from the top or side, and compare the package dimensions with the available counter space. A well-matched kit is easier to position, mist, inspect, and harvest without disrupting normal kitchen use.
Create the Right Growing Conditions
Place the kit where it receives indirect natural light, steady room temperatures, and regular fresh air. Avoid a dark cabinet, direct sun, heating vents, and strong air-conditioning streams. Set the block on a plate or shallow tray to catch drips, then leave open space around the growing surface so expanding caps do not press against a wall or appliance.
Follow the package directions when cutting the bag or exposing the fruiting surface. Many kits use a small X-shaped opening that admits oxygen while helping the block retain moisture. Mist the exposed area as directed, creating a fine coating rather than soaking it. In a dry home, a loose humidity tent with ventilation holes can reduce moisture loss, but the kit should never be sealed in airtight plastic.
Watch the Block Closely
The block may initially look inactive. White or off-white material spreading through brown substrate is generally healthy mycelium, not unwanted mold. Small bumps or tightly packed pins should eventually appear near the opening. Once pinning begins, growth can accelerate rapidly, so check the kit at least morning and evening without touching or squeezing the developing mushrooms.
Healthy growth should resemble the species pictured on the package. Oyster mushrooms develop layered caps, while lion’s mane forms a rounded mass with hanging teeth. Green, black, or orange patches, foul odors, or widespread sliminess are reasons to stop and contact the manufacturer. An earthy smell, firm texture, and species-appropriate color are more reassuring signs.
Harvest at the Best Stage
Do not wait for the mushrooms to become as large as possible. Oyster clusters are commonly harvested while the cap edges remain slightly curled downward, before the caps flatten or turn upward. Lion’s mane is generally picked before it yellows or becomes soft.
Hold the cluster near its base and twist gently, or cut it with a clean knife when the instructions recommend that method. Remove the full cluster, trim away attached substrate, and refrigerate mushrooms that will not be cooked immediately. Loose mushrooms keep better in a porous paper bag than in airtight plastic, which can trap moisture and speed deterioration.
Prepare for Another Flush
Many fruiting blocks can produce another flush, although later clusters may be smaller. After harvesting, remove loose material from the opening and follow the manufacturer’s reset directions. The block may need continued misting, a rest period, or a brief soak before new pins form. Do not guess at soak times because oyster, lion’s mane, and other species can require different handling.
When the block stops producing, follow the kit maker’s disposal guidance. The spent substrate may be suitable for composting or an appropriate outdoor garden area. Clean the tray and counter before starting another kit, and discard any remaining material that smells unpleasant or shows suspicious discoloration. A tidy reset makes the next growing cycle easier to monitor.
A Small Harvest With Everyday Value
A countertop kit offers more than a few meals. It makes the usually hidden activity of mycelium visible and shows how moisture, air, light, and temperature affect fungal growth. The process is brief enough to remain engaging, yet detailed enough to reward consistent care and close observation.
Success depends on a few practical habits: select a suitable species, prevent the block from drying, provide fresh air, and harvest at the recommended stage. Even one healthy flush can supply a fresh ingredient for sautés, soups, pasta, eggs, or grain bowls. More importantly, the kit turns an ordinary countertop into a productive growing space that can be reused whenever another mushroom crop sounds appealing.